Irresistible Frozen Chocolate Nut Clusters with Sea Salt: A Delicious Treat to Beat the Heat
When the temperatures rise, there’s nothing quite like a cold treat to refresh and rejuvenate. Frozen desserts, in particular, have an undeniable charm that draws people in, whether it’s a hot summer day or an indulgent snack any time of the year. Among the myriad of frozen delights, the combination of rich chocolate and crunchy nuts stands out as an irresistible option. This is where our recipe for Frozen Chocolate Nut Clusters with Sea Salt comes into play—a delightful creation that marries the luxuriousness of dark chocolate with the wholesome goodness of mixed nuts and coconut, all finished with a sprinkle of sea salt for that perfect contrast.
The appeal of this recipe lies not only in its taste but also in its simplicity. With just a handful of wholesome ingredients, you can craft these delectable treats in no time. Each bite offers a satisfying crunch, a burst of chocolatey goodness, and a hint of saltiness, making them an ideal snack for any occasion. Furthermore, the health benefits of the ingredients make these clusters not just a guilty pleasure but a nourishing option as well.
The Allure of Chocolate Nut Clusters
Chocolate nut clusters have gained immense popularity as a snack and dessert option, and for good reason. First, they are incredibly versatile. You can customize them with your choice of nuts or even swap out the chocolate type to suit your taste preferences. But beyond their adaptability, the combination of textures—smooth chocolate enveloping crunchy nuts—creates a sensory experience that is hard to resist.
From a health perspective, dark chocolate and nuts are nutritional powerhouses. Dark chocolate, particularly varieties with a high cacao percentage, is known for its rich antioxidant content and potential health benefits, including improved heart health and reduced inflammation. Nuts, on the other hand, provide essential fatty acids, protein, and a range of vitamins and minerals. Together, they create a snack that is not only satisfying but also beneficial to your overall well-being.
The flavor profile of these clusters is another aspect that elevates them to a must-try treat. The sweetness of the chocolate is beautifully balanced by the salty crunch of the nuts and the sprinkle of sea salt, creating a harmonious blend that keeps you coming back for more. Whether you’re enjoying them as a quick snack, a post-workout refuel, or a dessert after dinner, these frozen chocolate nut clusters are sure to please.
Ingredients Breakdown
Before diving into the preparation process, it’s essential to understand the role of each ingredient in this delightful recipe. Each component contributes not only to the flavor but also to the nutritional benefits of the final product.
1. Dark Chocolate Chips: The star of the show, dark chocolate chips form the base of our clusters. When selecting chocolate, pay attention to the cacao percentage; ideally, opt for chocolate that contains at least 70% cacao. Higher cacao percentages bring a deeper, more complex flavor and pack a greater punch of antioxidants. Dark chocolate is also lower in sugar compared to its milk chocolate counterpart, making it a healthier choice.
2. Mixed Nuts: The combination of almonds, cashews, walnuts, and pecans in these clusters adds a delightful crunch and a variety of flavors. Each type of nut brings its unique nutritional profile—almonds are high in vitamin E, walnuts offer omega-3 fatty acids, and pecans are rich in antioxidants. This medley not only enhances the texture but also provides a well-rounded source of healthy fats and protein.
3. Unsweetened Shredded Coconut: Coconut adds a tropical flair to the clusters, both in flavor and texture. Unsweetened shredded coconut is a great source of fiber, which aids in digestion, and adds a subtle sweetness that complements the chocolate. Additionally, coconut contains medium-chain triglycerides (MCTs), which are known to provide a quick source of energy.
4. Coconut Oil: Used to melt the chocolate smoothly, coconut oil also adds a touch of richness to the clusters. It helps create a glossy finish and enhances the mouthfeel. Plus, coconut oil is another source of healthy fats, making it a smart addition to this recipe.
5. Sea Salt: A sprinkle of high-quality sea salt is the finishing touch that elevates these clusters. Salt enhances the sweetness of chocolate and brings out the natural flavors of the nuts and coconut. Opting for a flaky sea salt can add an appealing texture and visual contrast to the clusters.
6. Pure Vanilla Extract: While the chocolate and nuts take center stage, a splash of pure vanilla extract rounds out the flavor profile. This aromatic addition adds depth and complexity, making each bite even more enjoyable.
Step-by-Step Instructions for Crafting Frozen Chocolate Nut Clusters
Now that we’ve covered the ingredients and their benefits, let’s jump into the preparation process. Crafting these frozen chocolate nut clusters is straightforward and requires minimal time, making it a perfect recipe for both novice and experienced cooks.
Melting the Chocolate
The first step in creating these delectable clusters is to melt the dark chocolate chips. To achieve the perfect melt, you’ll want to use a microwave-safe bowl. Start by placing the chocolate chips in the bowl and heating them in the microwave in short bursts, typically 20-30 seconds at a time. After each interval, stir the chocolate to help it melt evenly. This process not only prevents the chocolate from burning but also ensures a smooth consistency.
Once the chocolate is fully melted and glossy, you can add the coconut oil. Stir the oil into the melted chocolate until fully combined. This will create a luxurious texture that will help bind the clusters together and give them a rich mouthfeel.
Incorporating Flavor and Texture
The next step is to enhance the flavor and texture of your chocolate mixture. To do this, add in the pure vanilla extract, stirring well to ensure it is evenly distributed throughout the melted chocolate.
Now, it’s time to fold in your choice of mixed nuts and unsweetened shredded coconut. Gently mix the ingredients until they are fully coated in the chocolate. Be careful not to crush the nuts; you want to maintain their integrity for that satisfying crunch.
Once everything is combined, it’s time to form the clusters. Using a spoon or a small cookie scoop, drop spoonfuls of the mixture onto a parchment-lined baking sheet. Make sure to leave space between each cluster, as they will spread slightly as they freeze.
After forming all the clusters, sprinkle a pinch of flaky sea salt over each one. This step is crucial, as the salt enhances the overall flavor and provides that sought-after sweet-and-salty balance.
With the clusters formed and salted, place the baking sheet in the freezer. Allow the chocolate nut clusters to freeze for at least an hour, or until they are firm to the touch.
Stay tuned for the next part of this article, where we will explore the final steps in creating your Frozen Chocolate Nut Clusters with Sea Salt and tips for enjoying these delightful snacks!
{{image_2}}
Shaping the Clusters
Once you have thoroughly mixed your chocolate and nut mixture, it’s time to shape your clusters. The key to achieving a delightful texture and appearance lies in even portioning. Use a tablespoon or a cookie scoop to ensure uniformity in size. This not only makes for an aesthetically pleasing presentation but also ensures that each cluster is consistently delicious.
Recommendations for Portioning and Spacing on the Baking Sheet
When placing your clusters on the baking sheet, it’s essential to leave enough space between them. Aim for about 1-2 inches apart; this allows the chocolate to set evenly without merging into one another. Proper spacing is crucial as it gives each cluster room to maintain its unique shape while freezing. If you want to get creative, you can even experiment with different shapes, such as small mounds or flat discs, based on your preference.
Suggestions for Tools to Use (Tablespoon vs. Cookie Scoop)
For this recipe, both a tablespoon and a cookie scoop can work well, but each tool has its advantages. A tablespoon allows for more control when spooning out the mixture, while a cookie scoop provides a quick and easy way to create uniform clusters. If you opt for a cookie scoop, ensure it’s not too large; a medium-sized scoop (around 1.5 tablespoons) is ideal for creating bite-sized treats. Regardless of the tool you choose, the goal is to create clusters that are easy to handle and enjoyable to eat.
Adding a Touch of Salt
Sprinkling sea salt is a crucial step that elevates the flavor of your chocolate nut clusters. The timing for adding the salt can significantly impact the overall taste. After you’ve shaped your clusters and before placing them in the freezer, sprinkle a pinch of sea salt on top of each cluster. This not only enhances the sweetness of the chocolate but also adds a delightful contrast that makes each bite even more satisfying.
Explanation of the Timing for Sprinkling Salt and Its Flavor Impact
Adding salt just before freezing allows the flavors to meld without the salt dissolving into the chocolate. The salt will remain on the surface, providing that delightful crunch and burst of flavor when you bite into a cluster. This contrast between sweet and salty is what makes these treats truly irresistible.
Freezing for Firmness
Once your clusters are shaped and salted, it’s time to freeze them. Proper freezing is essential for achieving the right texture. Place your baking sheet with the clusters in the freezer and allow them to freeze for at least 30 minutes. This time frame is usually sufficient for the chocolate to harden completely, resulting in a firm yet creamy chocolate exterior.
Guidelines for Freezing Time and Achieving the Right Texture
If you prefer a firmer texture, consider leaving them in the freezer for up to an hour. Check for firmness by gently pressing on one of the clusters; it should feel solid but not overly hard. Once they have reached the desired consistency, transfer the clusters to an airtight container if you’re not consuming them immediately.
Storage and Enjoyment
To keep your chocolate nut clusters fresh, store them in an airtight container in the freezer. This maintains their texture and prevents freezer burn. When properly stored, these clusters can last for up to three months, although they may not stick around that long because they are so delicious!
Best Practices for Storing in an Airtight Container
When storing, consider using parchment paper between layers of clusters to prevent them from sticking together. This will make it easier to grab a few whenever you want a quick snack.
Suggestions on How to Enjoy the Clusters (Frozen vs. Slightly Thawed)
These chocolate nut clusters can be enjoyed straight from the freezer for a refreshing treat on a hot day, or you can let them sit at room temperature for a few minutes for a slightly softer texture. The choice is yours! If you like a fudgier chocolate experience, slightly thawing the clusters will allow the chocolate to soften while still maintaining a satisfying crunch from the nuts.
Presentation Tips for Serving
When it comes to serving your irresistible frozen chocolate nut clusters, presentation can enhance the overall experience. Consider using decorative bowls or platters to showcase your treats. A simple yet elegant arrangement can make all the difference in how your guests perceive the dessert.
Ideas for Serving: Decorative Bowls and Platters
Choose a bowl that contrasts with the dark chocolate color, perhaps a light-colored ceramic or glass dish. Arrange the clusters in a circular pattern or create small stacks for a more inviting appearance.
Suggestions for Garnishing with Additional Coconut Flakes or Sea Salt
For an extra touch, consider garnishing your clusters with additional coconut flakes or a light sprinkle of sea salt. This not only adds visual appeal but also enhances the flavor profile. By incorporating these finishing touches, you create a sophisticated dessert that is sure to impress.
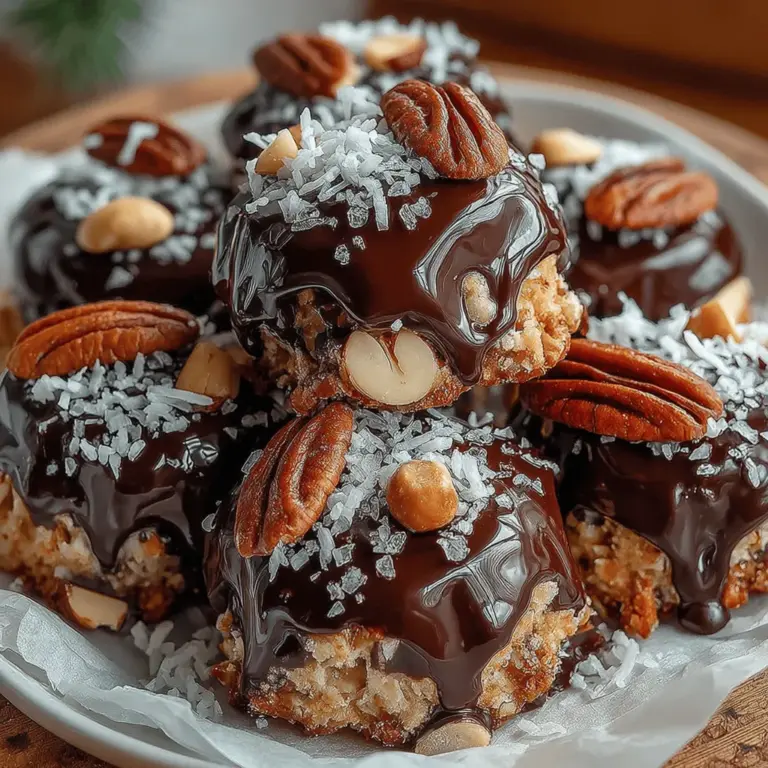
Highlighting the Visual Appeal of the Clusters
The glossy sheen of the chocolate, coupled with the speckled sea salt and the nutty textures, makes these clusters not just a treat for the taste buds but also for the eyes. A well-presented dish can stimulate appetite and create anticipation, making your chocolate nut clusters even more enjoyable.
Nutritional Information
While indulgent, these chocolate nut clusters also carry some nutritional benefits thanks to their wholesome ingredients.
Overview of the Nutritional Benefits of the Ingredients
The nuts provide healthy fats and protein, which can help keep you satiated. Dark chocolate, particularly when it contains a high cocoa percentage, is rich in antioxidants and can contribute to heart health. Coconut flakes add fiber and a touch of natural sweetness without the need for added sugars.
Estimated Caloric Content Per Serving
On average, each cluster contains approximately 70-80 calories, depending on the size and specific ingredients used. This makes them a guilt-free indulgence when enjoyed in moderation.
Discussion on Portion Control and Indulgence
While it may be tempting to grab a handful, practicing portion control is key to enjoying these treats as part of a balanced diet. Consider limiting yourself to 2-3 clusters per serving, which allows you to savor the flavors without overindulging.
Conclusion
In summary, these irresistible frozen chocolate nut clusters with sea salt are a delightful and simple treat to make. They offer a perfect balance of flavors and textures, making them an excellent choice for snacking or entertaining. Their versatility allows for countless variations, so feel free to experiment with different types of nuts or even flavors of chocolate.
As you explore the joy of creating your own homemade treats, remember that these clusters are not just a snack but also a way to indulge in a healthier lifestyle. With their rich taste and satisfying crunch, these clusters are sure to become a favorite in your household. Enjoy the process of making them, and let your creativity shine as you discover new ways to personalize this delicious recipe!
