Introduction
Chicken Parmesan Sliders are an irresistible and comforting meal option that brings joy to any gathering, be it a casual family dinner, a lively game day, or a cozy get-together with friends. These delightful bites are not only filled with flavor but also boast a perfect balance of textures, making them a guaranteed crowd-pleaser. The harmonious combination of tender chicken, rich marinara sauce, and melted cheese nestled within soft slider buns creates a mouthwatering experience that will leave everyone asking for seconds.
The beauty of sliders lies in their versatility. They can be easily customized to suit various tastes and dietary preferences, allowing you to create the perfect dish for any occasion. Whether you’re hosting a party or simply craving a comforting meal, Chicken Parmesan Sliders are the ideal choice. In this article, we will guide you through the process of creating these delectable sliders, starting from the ingredients to the cooking techniques that will elevate your dish to heavenly heights.
Understanding the Ingredients
To create the ultimate Chicken Parmesan Sliders, it’s essential to understand the key ingredients that contribute to their deliciousness. Each element plays a crucial role in achieving the perfect flavor and texture, ensuring that every bite is a delight.
Chicken
The star of our sliders is, of course, the chicken. For this recipe, it is vital to use boneless, skinless chicken breasts. This choice not only guarantees tenderness but also allows for even cooking. By opting for chicken breasts, you’ll ensure that the sliders remain juicy and flavorful, providing the perfect foundation for the other ingredients.
Breading
The breading is what gives Chicken Parmesan Sliders their signature crispy texture. The classic combination of flour, eggs, and breadcrumbs creates a delightful crust that seals in the moisture of the chicken while providing a satisfying crunch. Each component serves a specific purpose: flour helps the egg adhere to the chicken, eggs provide moisture and binding, and breadcrumbs create that sought-after crispy exterior.
For an extra twist, consider using seasoned breadcrumbs or panko for an even crunchier texture. This small change can elevate your sliders and add a new layer of flavor that your guests will love.
Sauces and Cheeses
No Chicken Parmesan is complete without marinara sauce and cheese. The marinara sauce adds a rich, tangy flavor that complements the savory chicken perfectly. When selecting your marinara, opt for a high-quality store-bought version or make your own for the freshest taste.
As for cheese, mozzarella and Parmesan are the traditional choices, and for good reason. Mozzarella melts beautifully, creating a gooey, stretchy layer on top of the chicken, while Parmesan adds a sharp, nutty flavor that enhances the overall taste profile. Together, these cheeses create a creamy, savory topping that is downright addictive.
Buns
The choice of buns is crucial to the overall structure and enjoyment of your sliders. Slider buns are designed to be soft yet sturdy enough to hold the filling without collapsing. Brioche or potato rolls are excellent options that provide a slightly sweet flavor and a soft, pillowy texture. However, feel free to experiment with other types of buns that suit your taste, like whole wheat or ciabatta.
Suggestions for Ingredient Substitutions
Cooking should be a fun and creative process, so don’t hesitate to make adjustments based on dietary preferences or ingredient availability. For those looking for a gluten-free option, substitute traditional breadcrumbs with gluten-free breadcrumbs or almond flour. If you’re aiming for a healthier alternative, consider using grilled chicken instead of fried to reduce calories and fat.
For a plant-based version, you can swap chicken for eggplant or a store-bought meat substitute, ensuring to follow the same breading process. Additionally, you can use dairy-free cheese alternatives to cater to lactose-intolerant guests.
Preparing the Chicken
Proper chicken preparation is key to achieving flavorful and tender Chicken Parmesan Sliders. Here’s a step-by-step guide on how to prepare the chicken for the best results.
Slicing Chicken into Thin Cutlets
Start by taking your boneless, skinless chicken breasts and placing them on a cutting board. Using a sharp knife, slice each breast horizontally into thinner cutlets. The goal is to create uniform pieces that will cook evenly, ensuring that each slider has a perfectly cooked chicken patty.
Aim for a thickness of about half an inch. If you find it challenging to slice the chicken evenly, consider placing the chicken in the freezer for about 20-30 minutes before cutting. This will firm up the meat, making it easier to achieve consistent slices.
Handling Chicken Safely
When working with raw chicken, it’s important to practice food safety to prevent cross-contamination. Always wash your hands thoroughly before and after handling raw chicken. Use separate cutting boards and utensils for raw chicken and other ingredients to avoid any potential bacteria transfer.
Additionally, ensure that you cook the chicken to an internal temperature of 165°F (74°C) to guarantee that it is safe to eat. Using a meat thermometer can be a helpful tool to check the doneness of your chicken cutlets.
Setting Up Dredging Stations
Creating an efficient dredging assembly line is essential for achieving the perfect coating on each chicken cutlet. Dredging not only adds flavor but also enhances the texture of the chicken, resulting in a satisfying crunch.
The Purpose of Each Dredging Station
To set up your dredging stations, you’ll need three shallow dishes. The first dish will hold seasoned flour, the second dish will contain beaten eggs, and the third dish will have breadcrumbs. Here’s how each component works:
1. Flour Station: Start by mixing all-purpose flour with a pinch of salt and pepper. This initial coating helps the egg stick to the chicken, creating a solid base for the breadcrumbs.
2. Egg Station: In the second dish, beat a few eggs until well combined. The eggs act as the glue that holds the breadcrumbs to the chicken, adding moisture and richness.
3. Breadcrumb Station: Finally, place the breadcrumbs in the third dish. If you’re using plain breadcrumbs, consider adding dried herbs, garlic powder, or grated Parmesan cheese to enhance the flavor profile.
Tips for Achieving the Perfect Coating
When breading your chicken cutlets, it’s essential to follow a specific order: first, dredge the chicken in the flour, coating it evenly on both sides. Shake off any excess flour before dipping it into the beaten eggs, ensuring that the chicken is fully coated. Finally, press the chicken into the breadcrumbs, making sure to cover it entirely. This three-step process ensures a thorough and even coating, which is key to achieving that crispy texture we all love.
To avoid a messy countertop, you can use one hand for the wet ingredients (egg) and the other for the dry (flour and breadcrumbs). This technique minimizes the amount of breading that gets stuck to your fingers, making the process smoother and more enjoyable.
Frying the Chicken
Frying the chicken cutlets is an essential step that brings out the flavors and textures of the dish. The process of frying not only creates a crispy exterior but also locks in the moisture of the chicken, resulting in juicy and flavorful cutlets.
The Frying Process
Begin by heating a generous amount of oil in a large skillet over medium-high heat. Vegetable oil or canola oil works well for frying due to their high smoke points. To test if the oil is ready, drop a small piece of bread into the oil; if it sizzles and browns quickly, you’re good to go.
Carefully place the breaded chicken cutlets into the hot oil, ensuring not to overcrowd the pan. Fry the chicken for about 3-4 minutes on each side, or until they are golden brown and cooked through. If you’re frying in batches, keep the cooked cutlets warm in a low oven while you finish frying the remaining pieces.
This frying process is crucial, as it not only enhances the flavor but also creates that sought-after crunch that makes Chicken Parmesan Sliders so delightful. The aroma of frying chicken will fill your kitchen, inviting everyone to gather around and anticipate the delicious meal ahead.
—
As we continue this culinary journey, you’ll learn how to assemble your Heavenly Chicken Parmesan Sliders and finish with the perfect baking technique to ensure everything melds together beautifully. Stay tuned for the next part of the recipe!
{{image_2}}
Importance of Oil Temperature and Cooking in Batches
When it comes to frying the chicken for your Heavenly Chicken Parmesan Sliders, achieving the right oil temperature is crucial. Ideally, you should aim for an oil temperature of around 350°F (175°C). This temperature ensures that the chicken cooks evenly, resulting in a crispy exterior while keeping the interior juicy and tender. If the oil is too hot, you risk burning the breading before the chicken is fully cooked. Conversely, if the oil is not hot enough, the chicken will absorb excess oil, leading to a greasy texture.
To maintain optimal oil temperature, it’s advisable to cook the chicken in batches. This allows the oil to recover its heat between batches, ensuring consistent cooking results. Depending on the size of your skillet and the number of chicken pieces, you may need to fry a few pieces at a time. Be sure not to overcrowd the pan, as this can lead to uneven cooking and undesirable results.
Recognizing When the Chicken is Done Cooking
To ensure perfectly cooked chicken, keep an eye on the color and texture. The chicken is done when it reaches a golden-brown hue, and the internal temperature should read 165°F (74°C) on an instant-read thermometer. The breading should be crisp, and the chicken should feel firm to the touch. Allowing the chicken to rest briefly on a paper towel-lined plate will help drain excess oil, enhancing the overall texture of the sliders.
Assembling the Sliders
Assembling your Heavenly Chicken Parmesan Sliders is where the magic happens. To maximize flavor and ensure a delightful eating experience, follow these step-by-step instructions:
1. Base Layer: Start with a slider bun, cutting it in half. Place the bottom half on a serving platter.
2. Chicken Placement: Carefully place a piece of the fried chicken on the bottom half of the bun. Make sure it’s centered and covers the bun adequately.
3. Marinara Sauce: Spread a generous spoonful of marinara sauce over the chicken. Aim for just enough to add flavor without soaking the bun, which can lead to sogginess.
4. Cheese Layer: Top the marinara with a slice of fresh mozzarella cheese or a sprinkle of shredded mozzarella. This is crucial for that gooey, melty texture that defines Chicken Parmesan.
5. Herbs and Seasoning: For an added burst of flavor, sprinkle some grated Parmesan cheese and fresh basil leaves on top. This elevates the flavor profile and adds a touch of color.
6. Top Bun: Finally, place the top half of the slider bun on top. Press down gently to ensure everything holds together.
Avoiding Soggy Buns
To avoid soggy buns, the layering of ingredients is key. Use marinara sauce sparingly and consider briefly heating it before adding it to the slider. This minimizes the moisture content and helps maintain the bun’s structural integrity. Additionally, toasting the slider buns lightly can create a barrier that helps prevent sogginess. Simply toast them in the oven for a few minutes before assembly.
Baking the Sliders
Once your sliders are assembled, it’s time to bake them. Preheat your oven to 350°F (175°C). Place the assembled sliders on a baking sheet lined with parchment paper to catch any drips and facilitate easy cleanup.
Baking is essential for several reasons. First, it allows the cheese to melt evenly, creating that irresistible gooeyness that pairs perfectly with the crispy chicken. Second, the baking process melds the flavors together, as the heat helps the ingredients to blend harmoniously.
Keep a close eye on your sliders while they bake. Typically, they will need about 10-15 minutes in the oven. Look for a bubbly, melted cheese layer and a slight browning on the top of the buns. The goal is to achieve a perfect melt without overcooking the sliders, so monitor them closely to avoid any burnt edges.
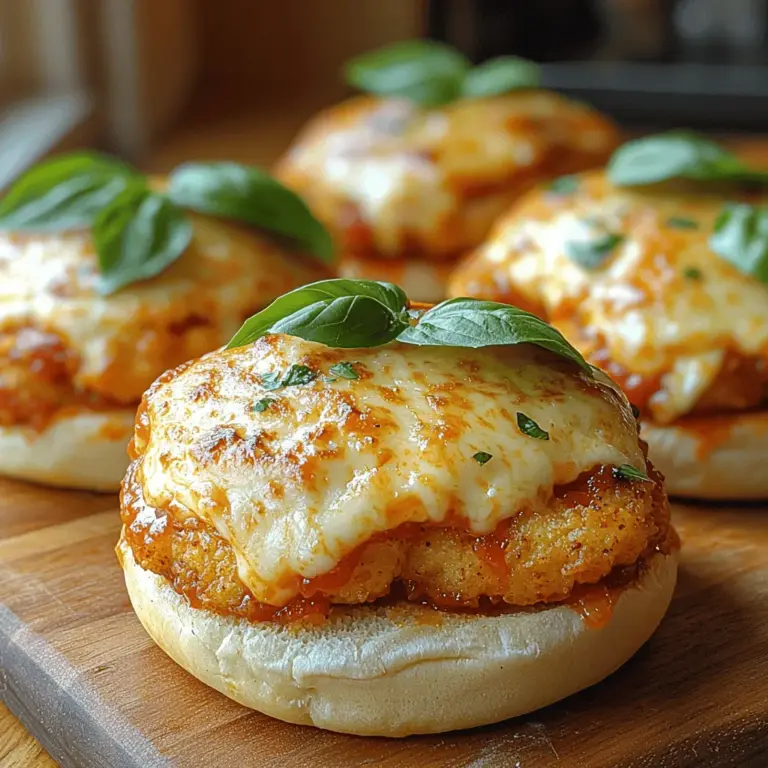
Garnishing and Serving Suggestions
Presentation is everything when it comes to serving your Heavenly Chicken Parmesan Sliders. For a pop of color and freshness, consider garnishing each slider with a sprig of fresh basil or a sprinkle of chopped parsley. This not only enhances the visual appeal but also adds a fresh herbal note that complements the flavors beautifully.
For serving, consider pairing your sliders with a variety of side dishes. Crispy baked fries or a light salad can provide a nice balance to the richness of the sliders. Alternatively, you can serve the sliders with a side of marinara sauce for dipping, allowing guests to customize their flavor experience further.
To elevate the dining experience, consider arranging the sliders on a wooden cutting board or a vibrant serving platter. This rustic presentation style is not only inviting but also encourages sharing, fitting for a dish that is as delightful to make as it is to eat.
Nutritional Information
While Heavenly Chicken Parmesan Sliders are undoubtedly indulgent, it’s important to consider their nutritional aspects. Each slider typically contains around 300-400 calories, depending on portion sizes and specific ingredients used. They offer a satisfying balance of protein from the chicken and cheese, while marinara sauce adds a touch of vitamins from the tomatoes.
A typical serving of two sliders provides approximately:
– Calories: 600-800
– Protein: 30-40 grams
– Carbohydrates: 50-70 grams
– Fat: 25-35 grams
While these sliders are a treat, balancing them with healthier sides or enjoying them in moderation can help align your indulgence with nutritional goals. Consider adding a side of steamed vegetables or a crisp salad to enhance the meal’s overall nutritional profile.
Conclusion
Making and sharing Heavenly Chicken Parmesan Sliders brings joy and satisfaction that is hard to replicate. The combination of crispy chicken, melty cheese, and flavorful marinara creates a symphony of flavors that delights family and friends alike. This recipe is not just about cooking; it’s about creating a memorable experience that is perfect for gatherings, game days, or a cozy family dinner.
We encourage you to try this recipe and savor the deliciousness for yourself. Whether you’re hosting a party or enjoying a quiet night in, these sliders will undoubtedly become a favorite. Embrace the comfort and satisfaction that comes from homemade sliders, and enjoy the smiles that follow with each delicious bite!
