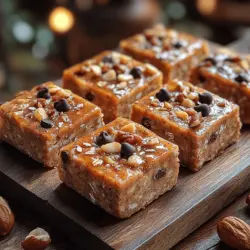
Nutty Banana Bliss Protein Bars Recipe
In recent years, protein bars have surged in popularity as a convenient, on-the-go snack. They offer a quick energy boost and a satisfying way to meet nutritional needs without sacrificing flavor. However, many store-bought options can be laden with artificial ingredients and excessive sugars. Enter the Nutty Banana Bliss Protein Bars, a wholesome homemade alternative that not only satisfies your sweet tooth but also supports your health goals. This recipe is an ideal solution for those seeking a nutritious snack that is both delicious and easy to prepare.
Nutty Banana Bliss Protein Bars are packed with wholesome ingredients that provide an array of health benefits. The star ingredients—rolled oats, ripe bananas, and creamy peanut butter—create a delightful combination of taste and nutrition. Rolled oats are a fantastic source of dietary fiber, which aids digestion and contributes to heart health. Ripe bananas add a natural sweetness while providing essential potassium, crucial for muscle function and maintaining electrolyte balance. Peanut butter, a staple in many healthy snack recipes, delivers healthy fats and protein, which are vital for muscle recovery and overall well-being.
The allure of these protein bars lies not just in their health benefits, but also in their simplicity. With just a few steps, you can whip up a batch of Nutty Banana Bliss Protein Bars that are perfect for snacking at home, post-workout refueling, or even as a quick breakfast option. The combination of flavors—from the nuttiness of peanut butter to the sweetness of bananas—creates a satisfying treat that will keep you coming back for more.
Understanding the Nutritional Benefits
The rise of protein bars in the health and wellness community can be attributed to their numerous benefits. They provide a quick source of protein, making them an excellent choice for those looking to build muscle or recover after workouts. However, not all protein bars are created equal. Many commercial options are filled with processed sugars and unhealthy fats, which can negate the potential health benefits. That’s why making your own Nutty Banana Bliss Protein Bars is a game changer.
Let’s take a closer look at the key ingredients in this recipe and the nutritional advantages they offer:
– Rolled Oats: A staple in many healthy recipes, rolled oats are rich in fiber, which not only helps to keep you feeling full longer but also supports heart health by lowering cholesterol levels. They are also a great source of complex carbohydrates, providing sustained energy throughout the day.
– Bananas: These versatile fruits are not only delicious but also contribute to the bars’ natural sweetness. Bananas are an excellent source of potassium, which is essential for maintaining healthy blood pressure levels and supporting muscle function. Additionally, they contain vitamins B6 and C, which play vital roles in metabolism and immune health.
– Peanut Butter: A beloved ingredient in many snack bars, peanut butter is packed with healthy monounsaturated fats, which can help reduce the risk of heart disease. It’s also a good source of protein, making these bars satisfying and filling. When choosing peanut butter, opt for natural varieties without added sugars or hydrogenated oils for the healthiest option.
– Honey or Maple Syrup: These natural sweeteners not only enhance the flavor of the bars but also provide additional nutrients. Honey is known for its antioxidant properties and its ability to soothe sore throats, while maple syrup is rich in minerals like manganese and zinc. Both options offer a healthier alternative to refined sugars.
– Protein Powder: Adding protein powder is an excellent way to boost the protein content of your bars, making them more effective for muscle recovery and overall health. There are various types of protein powders available, including whey, casein, and plant-based options like pea or brown rice protein, allowing you to customize your bars according to your dietary preferences.
– Dark Chocolate Chips: For those who enjoy a touch of decadence, dark chocolate chips provide a rich flavor and are packed with antioxidants. Consumed in moderation, dark chocolate can be a healthy addition to your diet, offering heart health benefits and enhancing mood.
– Mixed Nuts/Seeds: Adding a variety of nuts or seeds not only improves the texture of the bars but also contributes healthy fats, fiber, and additional protein. Nuts like almonds, walnuts, or seeds like chia and flaxseeds are excellent choices that enhance both nutrition and crunch.
Ingredients Breakdown
To prepare your Nutty Banana Bliss Protein Bars, you will need the following ingredients:
– 2 cups rolled oats
– 2 ripe bananas, mashed
– 1 cup creamy peanut butter (or almond butter for a nut-free version)
– 1/4 cup honey or maple syrup
– 1 scoop protein powder (flavor of your choice)
– 1/2 cup dark chocolate chips (optional)
– 1/2 cup mixed nuts or seeds (e.g., almonds, walnuts, chia seeds)
Substitutions and Variations:
Feel free to customize this recipe based on your dietary needs or preferences. For those looking to reduce sugar, you can adjust the amount of honey or maple syrup or opt for a sugar-free alternative. If you prefer a different nut butter, almond butter or sunflower seed butter can be excellent substitutes. For a nut-free version, ensure that your protein powder and any add-ins are also nut-free to avoid cross-contamination.
Additionally, you can experiment with different flavors of protein powder. Vanilla or chocolate protein powder can enhance the overall flavor profile of the bars. If you enjoy fruit, consider adding dried fruits like cranberries or raisins for added sweetness and texture.
Step-by-Step Instructions
Now that you have a clear understanding of the ingredients and their health benefits, let’s dive into the preparation process for your Nutty Banana Bliss Protein Bars. The first step in this easy recipe is to preheat your oven to 350°F (175°C). Preheating is crucial for ensuring that the bars bake evenly and achieve that perfect chewy texture.
1. Preheat the Oven: Set your oven to 350°F (175°C) and allow it to heat while you prepare the ingredients. This step is essential for even baking, ensuring your bars are cooked through without being overly dry.
2. Prepare Your Baking Dish: Line an 8×8 inch baking dish with parchment paper, allowing some overhang on the sides. This will make it easier to lift the bars out once they are set. If you don’t have parchment paper, you can lightly grease the dish with cooking spray or coconut oil.
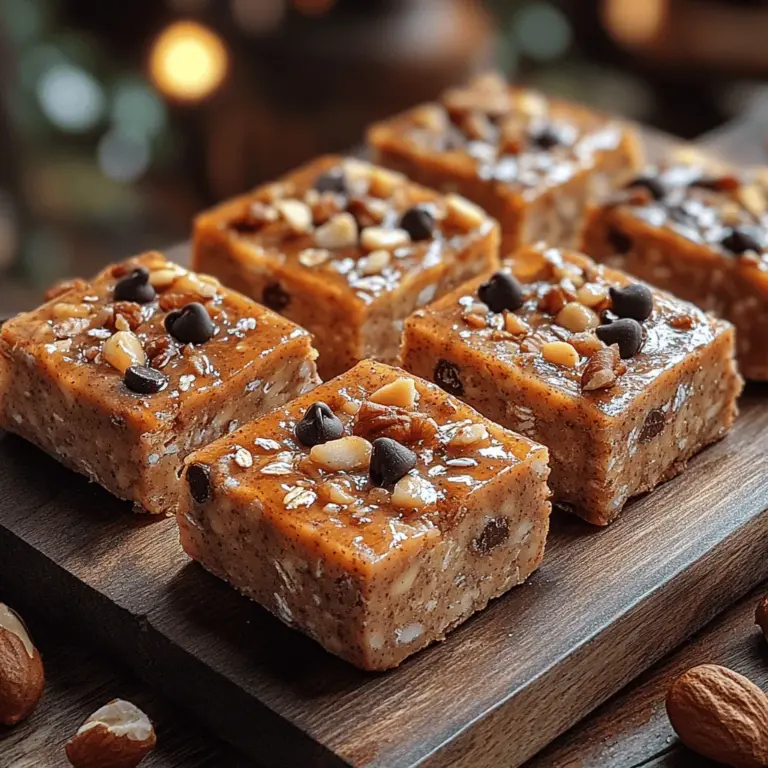
3. Combine the Ingredients: In a large mixing bowl, combine the mashed bananas and peanut butter until smooth. Then, add in the honey or maple syrup, mixing until fully incorporated. Gradually stir in the rolled oats and protein powder, followed by the dark chocolate chips and mixed nuts or seeds. Ensure that all ingredients are well combined and form a thick, cohesive mixture.
4. Transfer to Baking Dish: Pour the mixture into the prepared baking dish. Use a spatula or your hands to press the mixture evenly into the dish, ensuring that it is packed tightly. This helps the bars hold their shape during baking.
By following these steps, you will be well on your way to creating your very own Nutty Banana Bliss Protein Bars, a wholesome snack that caters to your nutritional needs while tantalizing your taste buds. In the next part of this article, we will explore baking, cooling, and storing these delicious bars, along with more tips and tricks to make the most of your protein bar-making experience.
{{image_2}}
Mixing Wet Ingredients
To create a delightful texture for your Nutty Banana Bliss Protein Bars, start by mixing your wet ingredients effectively. In a large bowl, combine ripe bananas, almond butter, honey, and vanilla extract. To achieve a smooth consistency, mash the bananas thoroughly before adding the other ingredients. A fork or potato masher works well for this task. For an even creamier blend, consider using an immersion blender or food processor.
Ensure that the almond butter is at room temperature, as this will help it blend seamlessly with the bananas and other wet ingredients. If your almond butter is too thick, you might want to warm it slightly in the microwave for about 10-15 seconds. This process not only makes it easier to mix but also helps to incorporate all flavors harmoniously.
Incorporating Dry Ingredients
Once your wet ingredients are well-mixed, it’s time to fold in the dry ingredients. Start by adding rolled oats, protein powder, chopped nuts, and any spices you choose (like cinnamon or nutmeg). The key to maintaining a pleasant texture is to fold the dry ingredients into the wet mixture gently.
Use a spatula or wooden spoon to combine the ingredients, moving from the bottom of the bowl to the top in a circular motion. Be careful not to overmix, as this can lead to denser bars. The goal is to have a well-combined mixture that holds together but still retains some texture from the oats and nuts.
Preparing the Pan
Before you pour your mixture into the baking pan, proper preparation is crucial for easy removal after baking. Line an 8×8-inch baking dish with parchment paper, allowing some overhang on the sides. This overhang will act as a handle, making it easy to lift the bars out once they have cooled.
To ensure the parchment paper stays in place, lightly grease the pan with cooking spray or a bit of oil before laying down the paper. This step will help prevent any sticking, allowing you to enjoy perfectly shaped protein bars without the hassle of scraping them out.
Baking Process
Baking your Nutty Banana Bliss Protein Bars requires careful attention to detail. Preheat your oven to 350°F (175°C) and bake the bars for 20-25 minutes. The bars are done when the edges are golden brown, and the center is firm to the touch.
For added assurance, insert a toothpick into the center of the bars. If it comes out clean or with a few moist crumbs attached, your bars are ready to be taken out. Be cautious not to overbake, as this can lead to dry protein bars. Remember, they will continue to firm up slightly as they cool.
Cooling and Cutting
After removing the bars from the oven, allow them to cool in the pan for about 10 minutes. This cooling period is essential for them to set properly. Once slightly cooled, use the parchment overhang to lift the bars out of the pan completely. Transfer them to a wire rack to cool down completely before cutting.
When it comes to slicing, a sharp knife is your best friend. For clean cuts without crumbling, ensure the bars are fully cooled. You can cut them into squares or rectangles, depending on your preference. For even portions, consider using a ruler to mark out the sizes before cutting.
Storage Recommendations
To keep your Nutty Banana Bliss Protein Bars fresh and delicious, store them in an airtight container. If you plan to consume them within a week, they can be kept at room temperature. For longer storage, consider refrigerating them, where they will last up to two weeks.
For even more extended preservation, you can freeze the bars. Wrap each bar individually in plastic wrap or foil, then place them in a freezer-safe bag. They can be stored in the freezer for up to three months. When you’re ready to enjoy one, simply thaw it in the refrigerator overnight or at room temperature for a few hours.
Why Make Your Own Protein Bars?
Comparison of Homemade Versus Store-Bought Protein Bars
Making your own Nutty Banana Bliss Protein Bars offers numerous advantages over purchasing pre-packaged alternatives. Store-bought protein bars often contain artificial ingredients, preservatives, and excessive sugars that can detract from their health benefits. By creating your bars at home, you control the ingredients, ensuring they are wholesome and free from unwanted additives.
Control Over Ingredients and Customization
Homemade protein bars allow you to tailor the recipe to meet your dietary preferences or restrictions. Whether you’re vegan, gluten-free, or looking to reduce sugar intake, you can adjust the ingredients accordingly. For example, substituting honey with maple syrup or agave nectar can cater to vegan diets, while using gluten-free oats can accommodate those with gluten sensitivities.
Economic Benefits of Making Protein Bars at Home
Economically, creating your protein bars is often more cost-effective than buying individual bars from the store. A single batch of Nutty Banana Bliss Protein Bars can yield ten to twelve servings, often for a fraction of the cost of a single store-bought bar. By purchasing ingredients in bulk, you can save even more, making this a budget-friendly option for health-conscious snackers.
Discussion on Reducing Added Sugars and Preservatives
One of the most significant advantages of homemade protein bars is the ability to reduce added sugars and preservatives. Many store-bought options are laden with sugar and artificial sweeteners, which can lead to energy crashes and other health issues. By creating your bars, you can ensure that they are naturally sweetened with ingredients like bananas and a touch of honey or maple syrup, promoting a healthier snacking experience.
Versatile Variations and Customizations
Suggestions for Flavor Variations
Your Nutty Banana Bliss Protein Bars can easily be customized to suit different flavor profiles. Consider adding a teaspoon of cinnamon or nutmeg for a warm, spiced flavor, or a splash of almond extract for a nuttier taste. If you enjoy a hint of chocolate, incorporating dark chocolate chips can elevate the flavor while adding additional antioxidants.
Ideas for Mix-Ins
Mix-ins are a fun way to personalize your protein bars further. Dried fruits such as cranberries, apricots, or raisins can add sweetness and texture. Additionally, seeds like chia, flax, or pumpkin seeds can boost the nutritional value and provide a satisfying crunch. For nut lovers, experimenting with various nut butters—such as cashew or peanut butter—can create unique flavor combinations.
Recommendations for Dietary Adaptations
If you’re following specific dietary guidelines, there are plenty of adaptations you can make. For a gluten-free option, ensure you use certified gluten-free oats. To make the bars vegan, substitute honey with agave nectar or maple syrup. If you’re looking for a protein boost, consider using plant-based protein powder instead of whey protein.
The Perfect Snack for Every Occasion
Highlighting When and Why to Enjoy Nutty Banana Bliss Protein Bars
Nutty Banana Bliss Protein Bars are a versatile snack perfect for various occasions. Whether you need a quick breakfast on the go, a pre-workout energy boost, or a satisfying post-workout recovery snack, these bars fit the bill. They are also suitable for family gatherings or as a healthy treat for kids after school.
Ideas for Pairing with Beverages
Enhance your snacking experience by pairing these protein bars with your favorite beverages. A smoothie or protein shake can complement your bars well, providing additional nutrients and flavor. Alternatively, enjoy them with a cup of coffee or tea for a comforting afternoon snack.
Suggestions for On-the-Go Snacks
These homemade protein bars are ideal for busy lifestyles. Their compact size makes them easy to carry in your bag or lunchbox, ensuring you always have a nutritious snack on hand. They are also great for travel, whether you’re heading to work, school, or an outdoor adventure.
Conclusion
Nutty Banana Bliss Protein Bars are not only a delicious and nutritious snack but also a testament to the benefits of homemade food. By creating these bars yourself, you gain control over the ingredients, allowing for customization to suit your taste and dietary needs.
Recap the health benefits of these protein bars: they are packed with wholesome ingredients, providing energy, protein, and fiber. The convenience of having a healthy snack readily available makes them a perfect addition to any balanced diet.
We encourage you to experiment with different variations and make the recipe your own. Share your personal adaptations and enjoy the satisfaction of knowing you’ve created a delicious, wholesome snack that contributes to a healthier lifestyle. Integrate these bars into your daily routine for a boost of energy and nutrition whenever you need it.